

Next: Third level tetraflexagon
Up: Second Level Tetraflexagon
Previous: Second level normal tetraflexagon
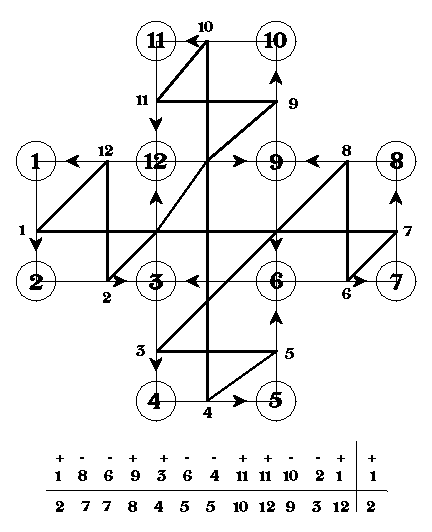
Figure 32:
The 12 vertices of the generic second level tetraflexagon can be connected to produce tubulations.
 |
Figure 33:
Permutation of the squares along the strip for a tubulating second level tetraflexagon.
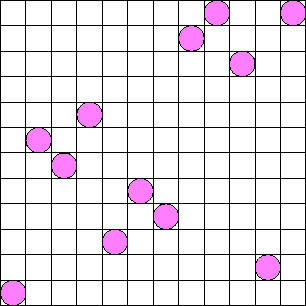 |
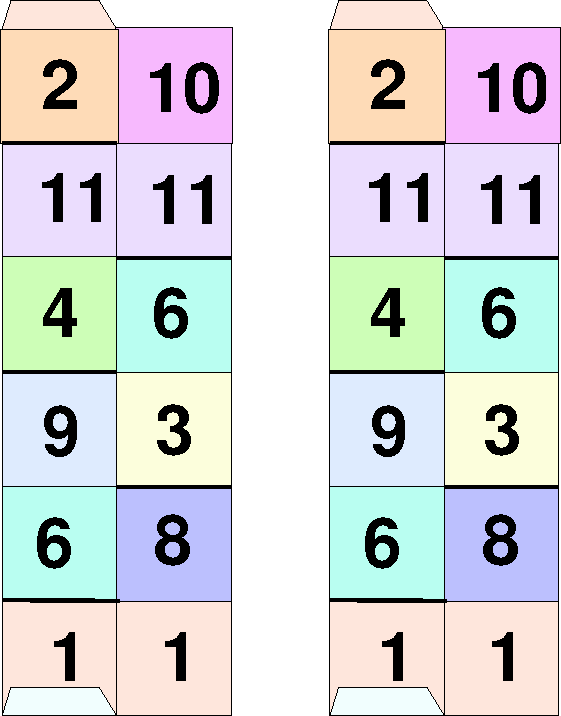
Figure 34:
Top side of the tubulating second level tetraflexagon. Two strips are shown, sufficient to make both of the two sectors which the flexagon requires.
 |
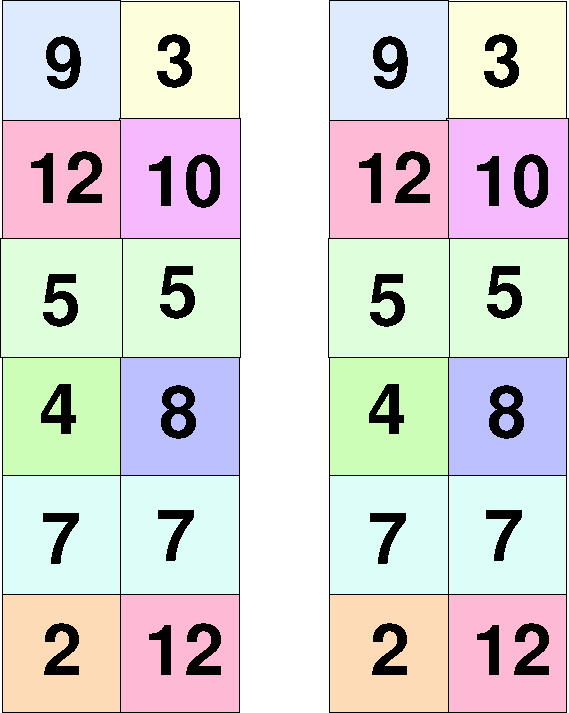
Figure 35:
Bottom side of the tubulating second level tetraflexagon. Two strips are shown, sufficient to make both of the two sectors which the flexagon requires.
 |
Microcomputadoras
2000-11-01
