


Next: Second Level Flessagon
Up: A Flexagon, Flexatube, and
Previous: First Level Flessagon
Figure 55:
The binary hessaflexagon has two cycles, each of which has two vertices in common with the other one, for a total of ten.
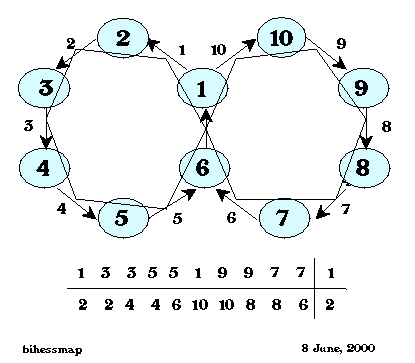 |
Figure 56:
Permutation of the hexagons along the strip for a binary hessaflexagon.
 |
Figure 57:
Top side of the first level hessaflexagon cutout. With ten faces, this cutout provides material for just the first sector (composed of two pats) of the two needed for the flexagon.
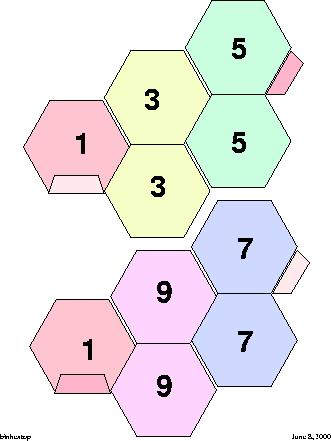 |
Figure 58:
Bottom side of the first sector of the binary hessaflexagon cutout. Two sectors are required.
 |
Figure 59:
Top side of the first level hessaflexagon cutout. With ten faces, this cutout provides material for just the second sector (composed of two pats) of the two needed for the flexagon.
|
Figure 60:
Bottom side of the second sector of the binary hessaflexagon cutout. Two sectors are required.
|
Next: Second Level Flessagon
Up: A Flexagon, Flexatube, and
Previous: First Level Flessagon
Example user SuSE Linux 6.2
2000-09-05