 |
The simplest, and presumably amongst the commonest, gliders are the A's, B's, and C's. Because of their simplicity, it is relatively easy to catalogue the multitude of collisions which results from different alignments and relative phases of the oncoming gliders. The A's move right, C's are static and B's move left, leaving A - B - C as the only ordering which needs detailled examination.
The C's embed into the ether according to three possible alignments of the vertical spine formed by the left edges of the column of T6's with T3's on the left. Since A gliders are formed by inserting some number of T1's just below each T3 in a slanting file of slope -2/3, the net effect of an A glider or a barrage of n A's is to move everything a distance 2n downwards along a fault line.
However, the T6's have period 7 in contrast to the even displacement occasioned by the T1's of the A's, which means that A's arriving in the wrong phase, or in sufficient numbers, can disrupt the alignment, which otherwise just shifts in accomodation.
On the right, there is less freedom, because there is but one alignment of ether T3's with respect to the T6's of a C. As a result there will always be a rearrangement, seen at first from the position of the C as an exchange of the points at which a T1 and a T3 tile connect to the hypotenuse of the T6. But of course that provokes greater change as the generations go on.
There are nine possibilities for the simplest collisions, according to the realignment required to match up the A's followed by the reaction to that alignment in the aftermath of an oncoming B. By separating the A's from the B's only six cases need to be considered unless the A's and B's arrive simultaneously or nearly simultaneously.
 |
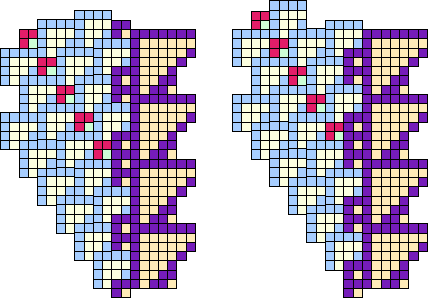
In Figure 3.3 the collisions are shown for the alignments ``lower T1'' [C2] which converts into ``upper T1,'' [C1] on the left, and ``T3'' [C3] which converts into ``lower T1," [C2] on the right.
 |
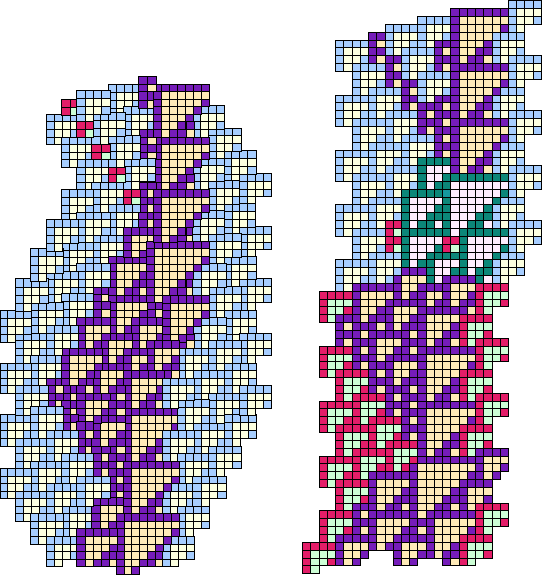
In Figure 3.4, the remaining collision does not rotate ``upper T1'' [C1] into ``T3'' [C3] but rather converts the collision mass into an F glider after a slight delay. An F glider moves leftward at one ninth the velocity of light. Actually Figure 3.4 also includes a similar reaction based on an incoming doubled A glider to produce the same final result.