


Next: Cook's F-glider, backward velocity
Up: Cook's E-gliders, velocity -4c/15
Previous: tiling approach to -4/15
Figure 2.29:
The E-bar glider has the same velocity as E gliders, but it takes twice as long to go through all its motions. Two periods of the E-bar are shown, to better to see how it fits in with the ether tiles. It is also presented with S tiles, to show the details of its embedment in the ether.
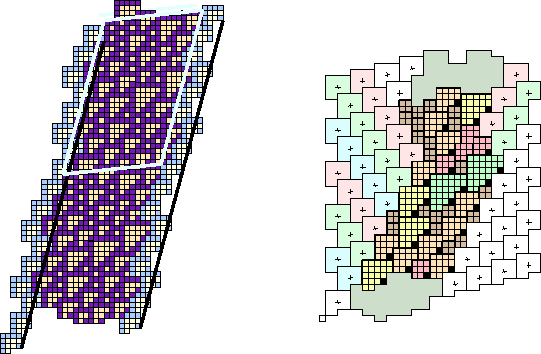 |
The EBar glider has coincidentally the same velocity as the E glider (from which it derives its name), but it takes twice as long to complete a period. On the left it spans six ether files, which are the routes along which an A glider would approach. On the right there are only two files, so that it is only necessary to distinguish between low mode and high mode when contemplating collisions with a B glider.
In examining pictures of evolution according to Rule 110, it is fairly noticeable that a single isolated T10 is a precursor to the EBar. Or at least when it interrupts the grain of the ether lattice in one particular fashion (ether one low on the left, one high on the right). A good example is seen in Figure 3.10.
Next: Cook's F-glider, backward velocity
Up: Cook's E-gliders, velocity -4c/15
Previous: tiling approach to -4/15
Example user SuSE Linux 6.2
2000-05-19