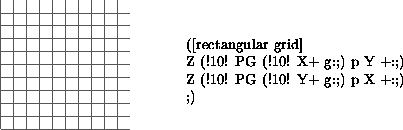
Figure 8 shows a REC/C program to map out a coordinate grid in the first quadrant by drawing lines of length 10 (as defined by the two counters) with integer coordinates. The pair of operators G and g correspond to PostScript functions moveto and lineto according to whether they establish an initial point or subsequent points for drawing line segments.
Clearly each coordinate set has an inner loop which draws a line of a certain length by repeating unit segments. The reason that one long line isn't drawn at once is that no provision for a variable length line was included amongst the REC operators, which in turn is a question of programming style. As it is, there are operators generating real or imaginary numbers at three scales, and they alone are used to make increments or decrements.
Each outer loop displaces the line it draws until it gets a grid. Evidently the counter in the outer loop should have been !11! to close the grid, since there is always one more boundary than there are intervals.
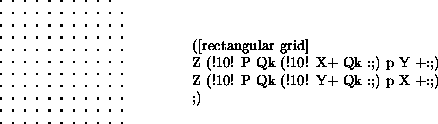 |
Instead of drawing line segments to establish a coordinate system, Figure 9 shows how to place dots at integer coordinate positions. This example can be studied in more detail by including the operator which defines the dot size and varying their size. Moiré effects can arise when the resolution of the dots requested disagrees with the texture of the printer which renders the final image.
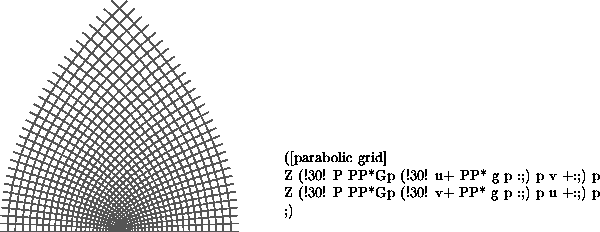
Once the drawing of coordinate grids has been understood, the mappings induced by a variety of common functions can be explored. Figure 10 explores the consequences of the mapping w = z2, which turns the coordinate grids into two families of orthogonal parabolas, opening in opposite directions. By mapping from a single quadrant, the image fills only half a plane, which already implies that the mapping will have a two-valued counterimage.
The image lines are more dense in this example than in the previous one because the middle scale increment has been used, which in turn was partially done to get smoother curves. But since squares increase rapidly, only three times (the square root of ten) as many increments were used, to keep the final figure down to the same size as before.
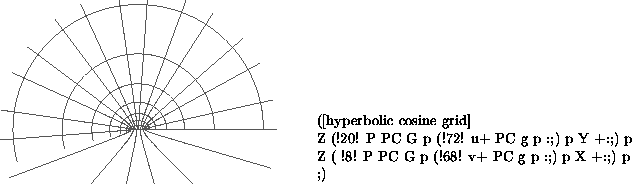 |
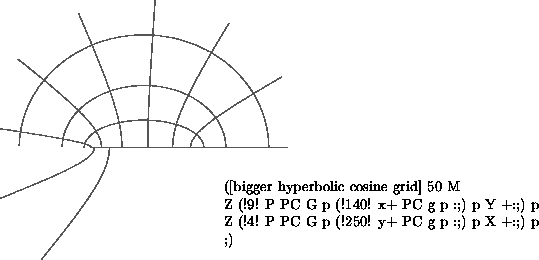
Another mapping, whose contours are ellipses and hyperbolas rather than parabolas, is the hyperbolic cosine, illustrated in Figure 11. Except for implied inclusion of an exponential factor, the hyperbolic cosine is nothing more than w = (z + 1/z) and the mapping involved is just as algebraic as the squaring which makes parabolas.
A lesson to be learned from Figure 11 is the convenience of proportioning the dimensions of the graphical representation so that 1 is never too near the center nor too near to the edge. The reason is not very complicated; first because 1 sits at the dividing line between growth and shrinkage of products of successively more numbers, and then because once there are even three or four factors, the scale of everything has completely changed. So 1 had better sit at a good vantage point.
Compare Figure 12 where the increments are now much finer, more of them are used, and the multiplier of 50 has been used to give a better relationship between dimensions within the complex plane and the size of the pixels in the screen image. The unit 1 is now quite a bit further out from the center than it was before, still leaving room for other small integers.